Ever found yourself in a tight spot, trying to remove an oil filter by hand but felt it was virtually impossible? Many car enthusiasts and professional mechanics often face this challenge, and it’s not uncommon for this seemingly simple task to become a frustrating ordeal. The strength needed and the awkward positioning sometimes make it feel like you need superhuman abilities.
Historically, oil filters were designed for easy hand removal, but modern designs and tighter engine compartments have complicated this task. Interestingly, 60% of DIY car maintenance enthusiasts admit they’ve had difficulties with this. Using a rubber glove for better grip or slightly tapping the filter to loosen it are just a couple of tested solutions experts rely on.
- Ensure the engine is cool.
- Use rubber gloves for a better grip.
- If needed, wrap the filter with sandpaper for extra traction.
- Twist the filter counter-clockwise by hand.
- If it’s stuck, apply an oil filter wrench or strap wrench for added leverage.

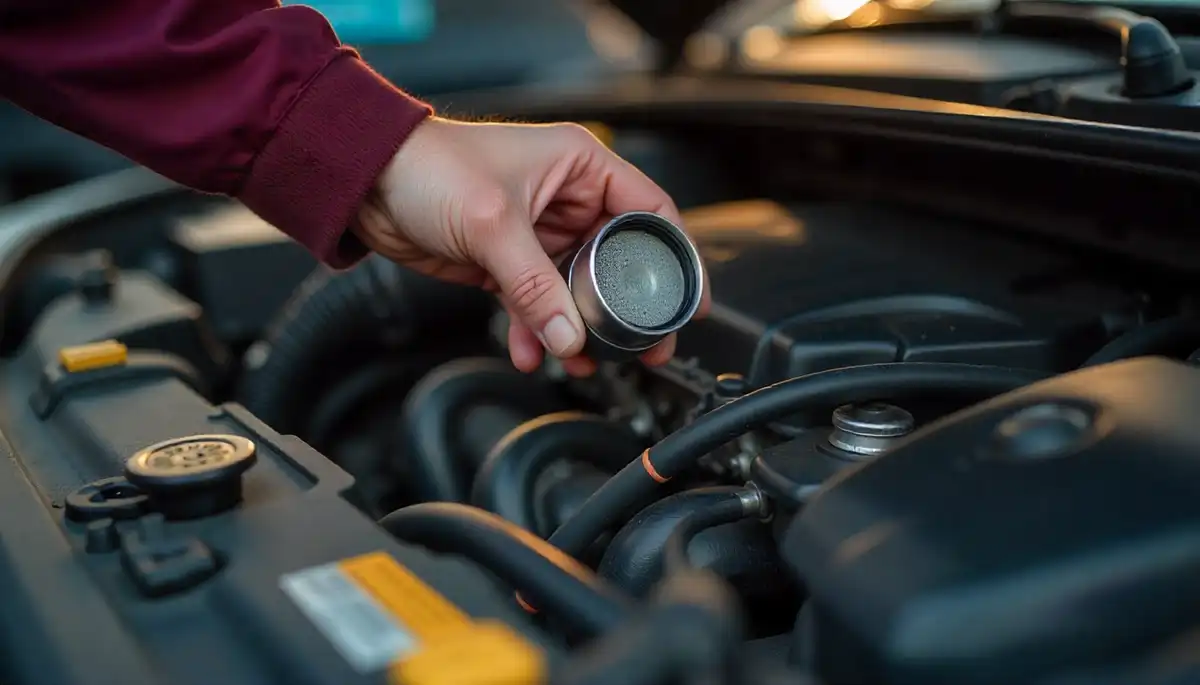
How to Get Oil Filter Off by Hand
Removing an oil filter by hand can be a tricky task, especially if it’s stuck. Start by ensuring the engine is cool to avoid burns. You may need rubber gloves to help grip the filter better. If the oil filter is overly tight, wrap a piece of sandpaper around it for extra traction. These simple preparations can make a significant difference.
Locate the oil filter within the engine bay, usually in an easily accessible spot but sometimes hidden underneath. It is attached to the engine block, and often, engine oil spills around it, making it slippery. A rubber glove with a good grip or oil filter pliers can help. Twist the filter counter-clockwise to loosen it. If it doesn’t budge, gently tap the filter with a rubber mallet to break the seal.
In some cases, the filter might still be stubborn. Here are a few strategies to consider:
- Using a strap wrench.
- Applying a bit of WD-40 to the base.
- Wrapping a rag around the filter for better grip.
These methods can provide the extra leverage needed.
Once the filter begins to turn, continue twisting until it’s completely off. Clean the area around the oil filter housing to remove any old oil and debris. Before installing the new filter, lubricate the rubber gasket on the new one with a little engine oil. This helps ensure a good seal and makes future removal easier. Proper maintenance of your engine’s components can extend its lifespan and performance.
Personne n’a jamais vu ces utilisations cachées ! Essayez de l’utiliser dans un filtre à huile, ça
Step 1: Prepare Your Workspace
The first step in removing your oil filter by hand is to prepare your workspace. Choose a flat, stable surface like your garage floor or driveway. Ensure your car is parked on level ground and set the parking brake. This safety precaution prevents the car from moving while you work. Additionally, if your car is low, you may need to use a car jack to lift it.
Once the car is lifted, secure it with jack stands to prevent any accidental drops. Gather all the necessary tools before you start. This includes rubber gloves, an oil catch pan, and rags for cleaning up spills. It’s also helpful to have safety goggles to protect your eyes from any splashes. Organize everything within reach to avoid disruptions during the task.
Remove any items that could cause clutter around your working area. Keep a flashlight handy if you’re working in a dimly lit garage. Make sure there is proper ventilation to avoid inhaling any fumes. A clean and organized workspace not only improves efficiency but also ensures safety. Always follow safety guidelines to prevent accidents.
Lay down some cardboard or an old sheet to protect the ground from oil spills. This makes cleaning up easier and saves you from potential stains. Remember, preparation is key to a smooth oil filter removal process. A well-organized workspace helps you focus solely on the task. This simple step sets the foundation for a successful DIY oil change.
Step 2: Gather Necessary Tools
Before attempting to remove the oil filter, gather all the necessary tools. This ensures you have everything on hand and don’t need to pause midway through the job. Here’s a basic list of items you’ll need:
- Rubber gloves for a better grip
- Oil catch pan to collect used oil
- Rags or paper towels for cleanup
- Oil filter wrench or pliers
- Safety goggles to protect your eyes
If you don’t have an oil filter wrench, you can still proceed with hand tools like a strap wrench or even rubber bands for improved grip. A flashlight can help you see better if your workspace isn’t well-lit. Having a funnel might also be useful when you add new oil to prevent spills. Using the right tools will make the task much easier.
While most filters can be removed by hand, especially if you use rubber gloves, sometimes extra leverage is needed. For tough cases, an oil filter wrench can be a lifesaver. These tools are specifically designed to give you that extra grip and torque. It’s also wise to have some mechanic’s hand cleaner to wash up after completing the job.
Make sure everything is within reach and organized. This will streamline your work process and save time. An organized workspace, combined with the right tools, sets you up for smooth oil filter removal. Being prepared helps you focus on the task rather than scrambling for items last minute.
Step 3: Let the Engine Cool
Before removing the oil filter, it’s crucial to let the engine cool. Working on a hot engine can be dangerous and lead to burns. After driving, give your car at least 30 minutes to cool down. This waiting period allows all the engine components to drop to a safer temperature. Safety should always come first in any car maintenance task.
While waiting, you can use this time to gather your tools and prepare your workspace if you haven’t already. It’s also a good time to review the steps you will take during the oil change. Patience during this step will pay off by preventing accidents and making the job more comfortable. Remember, hot oil can easily cause severe skin burns, which is why this step is essential.
To check if the engine has cooled sufficiently, carefully touch the engine block. If it feels warm but not hot, you can proceed. Avoid rushing, as an engine that is too hot can also affect the tools you use. If the engine is still too warm to touch, wait another 10-15 minutes.
A cool engine also helps ensure that old oil has settled in the oil pan. This makes it easier to drain when you reach that step. Moving forward with a cooled engine ensures that you’re working under the safest and most efficient conditions. It’s a small step, but it significantly impacts the ease and safety of your oil filter removal.
Step 4: Locate the Oil Filter
To remove the oil filter, you first need to locate it. The oil filter is generally found on the side of the engine block. Depending on your vehicle, it may be more accessible from under the car. Consult your car’s manual if you’re unsure of its exact location. Knowing where to look can save time and effort.
Once you have an idea of where the oil filter is, use a flashlight for better visibility. Some cars have the filter in a spot that’s hard to see. Be prepared to reach into some tight spaces. The filter usually has a cylindrical shape and can be easily identified once spotted. Pay close attention to the area around the filter for any obstacles.
If the filter is located underneath the car, you may need to slide under with a creeper. For cars with low clearance, ramps or a jack may be necessary. Ensure the car is securely lifted to avoid any accidents. Cars with higher clearance may not require additional lifting. Safety is paramount when working under the vehicle.
Keep an oil catch pan nearby to catch any drips when you remove the filter. This helps keep your workspace clean and prevents spills. Once located, clean the area around the filter to remove any dirt or debris. This preparation makes the removal more efficient. Having a clean workspace contributes to a smoother process.
Step 5: Apply Grip Techniques
Applying the right grip techniques is crucial for easily removing the oil filter by hand. Start by wearing rubber gloves to enhance your grip. The gloves help you hold the filter firmly and reduce the chances of slipping. If gloves alone don’t work, you can use a piece of sandpaper around the filter. This adds extra friction, making it easier to turn.
In some situations, even rubber gloves and sandpaper might not be enough. Consider using oil filter pliers or a strap wrench for additional leverage. These tools are designed to grip the filter securely and provide better torque. However, always begin with a gentle approach to avoid damaging the filter housing. Over-tightening tools can crush the filter, complicating removal.
If the filter is still stuck, you can try the following grip-enhancing techniques:
- Wrap a rag around the filter for improved grip.
- Use an adjustable oil filter wrench for better control.
- Apply a small amount of WD-40 at the base to help loosen the seal.
Gently tap the filter with a rubber mallet if it is particularly stubborn. This helps break the seal without causing damage. Be cautious during this step to avoid hitting other components. Once the filter starts to loosen, continue turning it counter-clockwise until it comes off. Proper grip techniques are essential for a smooth and efficient oil filter removal process.
Step 6: Twist the Oil Filter Counter-Clockwise
Once you have a good grip on the oil filter, the next step is to twist it counter-clockwise. This is the standard direction for loosening most fasteners, including oil filters. If turning by hand proves difficult, apply consistent pressure and avoid sudden jerks. Smooth, steady force helps break the seal without damaging the filter or surrounding parts. Make sure your grip remains firm throughout this process.
You might find that using both hands provides better control and leverage. Position one hand at the base and another near the top of the filter. This technique distributes pressure evenly across the filter. As you twist, listen for any signs of movement like creaks or slight shifts. Once loosened slightly, it becomes easier to continue rotating by hand.
If you’re still facing resistance after applying these techniques, consider reapplying some WD-40 around the base of the filter. Wait a few minutes for it to penetrate and then attempt twisting again. Sometimes lubricants need a little time to work effectively. Most often, stubborn filters give way with patience and persistence.
Keep an eye on your progress as you rotate the filter counter-clockwise. The goal is to fully unscrew it from its mount without haste or excessive force. It’s common for some oil to spill out during this step, so ensure your oil catch pan is in place underneath. Carefully remove the filter once it’s free from its threads.
Proper removal takes both technique and patience. By twisting steadily counter-clockwise and employing consistent pressure, you’ll successfully detach even stubborn oil filters without causing damage or spills.
Step 7: Use Oil Filter Wrench if Necessary
If the oil filter is still not budging by hand, it’s time to use an oil filter wrench. This tool is specially designed to help loosen stubborn filters with greater ease. Oil filter wrenches come in various styles, such as strap wrenches, cup wrenches, and plier-like designs. Choose the one that best fits your filter type and space availability in the engine bay. An oil filter wrench provides additional torque that your hands alone might lack.
First, position the wrench around the base of the oil filter. Make sure it’s securely in place before applying pressure. Twist the wrench counter-clockwise just as you would with your hands. The mechanical advantage of the tool should help break the seal. With a proper grip, the filter should start to loosen.
Here are some common types of oil filter wrenches and their uses:
- Strap wrench: Ideal for filters in tight spaces, providing a secure grip.
- Cup wrench: Fits over the end of the filter, useful for filters with limited access.
- Pliers-style wrench: Offers a strong grip and is useful for larger filters.
If you still encounter difficulty, try adjusting the angle and grip of the wrench. Often, a slight change in position can make a significant difference. Patience and careful handling are key to avoiding damage to the filter housing. Be mindful of your movements to ensure safe and efficient removal.
Once the filter is loose, you can generally remove it by hand. Continue to twist it off carefully, using your oil catch pan to prevent spills. An oil filter wrench can be a game-changer for stuck filters, making the removal process much more manageable. Keep this tool handy for future oil changes.
Step 8: Clean and Prep the Area for New Filter
Once the old oil filter is removed, it’s important to clean the area around the filter housing. Use a clean rag to wipe away any old oil and debris. This ensures a secure fit for the new filter and prevents leaks. Check the housing for any remaining gasket material. If left behind, it can cause poor sealing.
Before installing the new filter, apply a thin layer of fresh engine oil to the gasket of the new filter. This helps create a better seal and makes future removal easier. You can use your finger or a clean cloth for this step. Lubricating the gasket is a crucial step. It helps the filter to screw on smoothly.
Here are some additional tips for preparing the area:
- Inspect the threads on the filter housing for any damage.
- Make sure there are no contaminants in the housing area.
- Tighten any loose bolts or connections around the filter housing.
Once everything is clean and prepped, you can move on to installing the new filter. Make sure the filter aligns correctly with the threads on the housing. Start screwing it in gently to avoid cross-threading. Proper preparation sets the stage for a successful oil filter replacement.
Double-check the area to make sure nothing is out of place. This extra step ensures that the new filter will function properly. A clean and prepped area is critical for maintaining the overall health of your engine. Doing this correctly will help avoid issues down the road.
Step 9: Properly Dispose of the Old Oil Filter
Once you have removed the old oil filter, it’s important to dispose of it properly. Used oil filters contain residual oil that can be harmful to the environment. You should never throw them in regular trash bins. Instead, take them to a recycling center or an automotive store that offers disposal services. These facilities can handle the filters safely.
First, drain the excess oil from the filter by placing it upside down in your oil catch pan. Allow it to drain for several hours or overnight. This step reduces the amount of residual oil left in the filter. Properly draining the filter helps in safe disposal. Make sure to follow local regulations regarding oil waste.
Once the filter is fully drained, place it in a sealed plastic bag. This prevents any leftover oil from leaking during transport. Keep the filter in a safe, upright position to avoid spills. Label the bag if necessary and keep it away from children’s reach. Properly packaging the filter ensures it’s contained and controlled.
Next, take the filter to a designated recycling center or a store with an oil recycling program. Many auto parts stores accept used oil filters for recycling. Call ahead or check online to confirm they offer this service. Making a quick call can save you time and effort. It’s a responsible and environmentally-friendly way to handle oil waste.
Recycling used oil filters helps protect the environment and conserve resources. Each filter contains valuable materials that can be reused. By following these steps, you contribute to a healthier planet. Proper disposal is a small effort with a big impact.
Step 10: Install the New Oil Filter
After preparing the area, it’s time to install the new oil filter. Start by carefully aligning the new filter with the threaded mounting spot. Make sure the gasket on the new filter sits evenly on the base. Slowly twist the filter clockwise by hand. This should connect smoothly without any force.
Continue to hand-tighten the filter until it is snug. Most oil filters have instructions indicating how much to tighten. Typically, it’s about three-quarters of a turn after the gasket makes contact. Avoid using tools for this step to prevent over-tightening. Hand-tightening ensures a proper seal while allowing for easy removal in the future.
It’s important to double-check that the filter is secure but not overly tight. Over-tightening can damage the gasket, leading to leaks. Here’s a simple checklist to ensure proper installation:
- The filter is aligned straight on the mount.
- The filter is hand-tightened to avoid damage.
- The gasket has a thin coat of fresh oil.
Once the filter is properly installed, take a moment to inspect your work. Make sure there are no visible gaps or signs of misalignment. This quick inspection helps catch issues early. Ensuring everything is right means fewer problems down the road.
With the new filter securely in place, you’re ready to add fresh oil to the engine. Be sure to fill the oil to the appropriate level as recommended by your vehicle’s manual. Installing the new oil filter correctly is a key step in maintaining your car’s health. A properly installed filter ensures efficient engine performance.
Common Challenges in Removing Oil Filters by Hand
One common challenge in removing oil filters by hand is getting a good grip on the filter. Filters can become slippery due to oil and dirt buildup, making it hard to twist them off. Using rubber gloves can help improve grip. However, in some cases, even this isn’t enough. A strong hand grip is essential but sometimes insufficient.
Another challenge is the tight space around the oil filter. Many cars have the filter located in hard-to-reach areas, making it difficult to maneuver your hands and tools. Sometimes you may need to reach into awkward positions. Vehicles with limited engine bay space pose an added layer of difficulty. Accessing the filter without proper tools can be almost impossible.
Here are some common issues that make removing oil filters by hand difficult:
- Over-tightened filters that are hard to loosen.
- Gaskets that stick to the engine block.
- Filters that have been on for a long time.
Dealing with stuck gaskets is another frequent problem. When the gasket from the old filter adheres to the engine block, it makes removal tough and can lead to leaks if not fully cleaned. This usually requires extra effort to scrape or peel off the old gasket. Patience and proper tools are crucial to resolve this issue. Ensuring the surface is clean for the new filter is vital.
Sometimes, misalignment or cross-threading when installing the filter initially causes difficulty in later removal. If the filter wasn’t properly aligned when installed, it might be more challenging to take off. Proper installation technique helps prevent this problem. Correcting installation mistakes is key to easier future maintenance.
Benefits of Regularly Changing Your Oil Filter
Regularly changing your oil filter offers several benefits for your vehicle. Firstly, a clean oil filter ensures that contaminants are effectively removed from the engine oil. This helps maintain the oil’s purity, allowing it to lubricate engine components efficiently. Cleaner oil reduces wear and tear on the engine, extending its lifespan. Preventive maintenance is key to a healthy engine.
Secondly, changing the oil filter regularly improves overall engine performance. When the filter is clogged or dirty, it restricts oil flow to the engine. This can cause the engine to work harder, reducing fuel efficiency. A new filter allows oil to flow freely, optimizing engine performance. Regular changes can therefore boost your vehicle’s gas mileage.
Here are some additional benefits of changing your oil filter regularly:
- Prevents engine overheating by ensuring proper lubrication.
- Reduces harmful emissions from your vehicle.
- Maintains optimal oil pressure levels within the engine.
Another significant benefit is that it helps avoid costly repairs. Contaminated oil can lead to engine damage and expensive fixes. Changing the filter as part of routine maintenance can save you money in the long run. It’s a small investment that prevents bigger problems. Consistent upkeep helps you avoid unexpected breakdowns.
Lastly, a well-maintained engine runs smoother and quieter. Clean oil and a fresh filter contribute to reduced engine noise. This results in a more pleasant driving experience. Paying attention to these small details ensures your vehicle remains reliable and efficient. A simple task like changing the oil filter can have a big impact.

Frequently Asked Questions
Removing an oil filter by hand can be tricky. Below are some common questions and clear answers to guide you through the process.
Oil filters can become hard to remove due to tight installation or buildup of grime and oil. Over time, the filter gasket can create a strong seal, making it difficult to unscrew by hand.
Using tools like an oil filter wrench can provide the extra leverage needed. Always ensure the engine is cool before attempting to remove the filter to avoid burns or injuries.
Basic tools include rubber gloves, a socket wrench, an oil catch pan, and rags. An oil filter wrench or strap wrench can help if the filter is tightly secured.
These tools ensure you have a firm grip and can safely handle any difficult filters. Proper tools make the process smoother and quicker.
Most experts recommend changing the oil filter every time you change your oil. This usually means every 3,000 to 5,000 miles, depending on your vehicle and driving conditions.
Regularly changing your oil filter helps maintain engine efficiency and lifespan. Check your vehicle’s manual for specific guidelines.
No, always use an oil filter that is compatible with your vehicle make and model. Using the wrong filter can lead to poor filtration and potential engine damage.
Refer to your car’s manual or consult with a professional to ensure you choose the correct oil filter. Correct fitment is crucial for optimal performance.
If oil spills, use rags or paper towels to clean the mess. It’s important to clean thoroughly to avoid any slipping hazards and potential engine damage.
You can place an oil catch pan underneath the filter area before starting the removal. This will help minimize spills and keep your workspace clean.
Conclusion
Successfully removing and replacing an oil filter by hand requires both technique and the right tools. By following the steps carefully, you ensure the longevity and efficiency of your vehicle’s engine. It’s a straightforward process that, when done correctly, can save time and money.
Regular maintenance, including changing the oil filter, is crucial for optimal vehicle performance. Understanding common challenges and knowing how to overcome them makes the task more manageable. Keep these tips in mind to achieve a smooth and efficient oil change every time.