
Have you ever noticed a warning light on your dashboard and felt a twinge of panic, wondering if your tires were about to give up on you? The TPMS (Tire Pressure Monitoring System) is a valuable safety feature that alerts you to significant drops in tire pressure. However, diagnosing which sensor is malfunctioning without a scanner can be quite challenging, yet it is crucial in ensuring safe driving conditions.
To determine which TPMS sensor is at fault, you can start with a visual inspection, checking the tire with significantly lower pressure compared to others. Historically, TPMS was introduced to prevent accidents caused by under-inflated tires, especially after the Firestone-Ford tire failure incidents in the early 2000s. Notably, around 30% of tire-related crashes are due to under-inflated tires, making an accurate diagnosis vital. Another method involves using a tire inflator to adjust pressure levels and observing which tire’s pressure reading fails to update.
- Check for warning lights on the dashboard indicating TPMS issues.
- Visually inspect all tires for obvious damage or low pressure.
- Manually check tire pressure with a gauge to find discrepancies.
- Compare these readings and note any significant differences.
- Rotate the tires and observe if the warning light location changes.

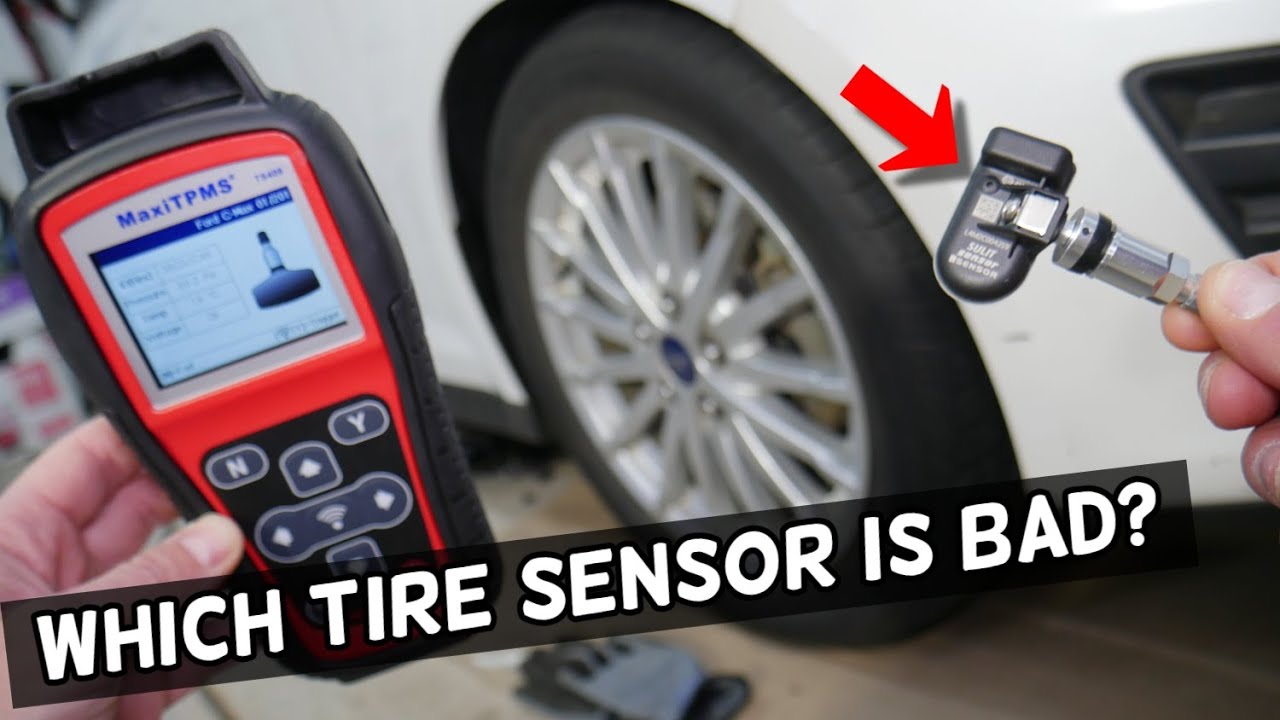
How to Tell Which TPMS Sensor is Bad Without Scanner
Understanding which tire pressure monitoring system (TPMS) sensor is bad without a scanner can be tricky, but it’s manageable. Start by checking the warning lights on your dashboard. The TPMS light will indicate there’s an issue, but it won’t specify which tire. Often, the problematic tire is the one with significantly lower air pressure. A quick visual inspection can provide a clue.
Next, manually check the tire pressure with a gauge. Record the pressure readings from all four tires and compare them. The sensor connected to the tire with the unusual reading is likely the faulty one. Maintaining proper tire pressure is essential for safety and fuel efficiency. Regular checks can help identify issues before they become serious.
A helpful tactic is to rotate your tires. Move the tire you suspect has a bad sensor to a different position on the vehicle. If the TPMS warning light changes location, you’ve confirmed the faulty sensor. This method, while time-consuming, avoids the need for specialized equipment. It’s a practical solution for many drivers.
In some cases, you might need to reset the TPMS system. Check your vehicle’s manual for specific instructions on how to do this. If the light stays on after resetting and rotating the tires, it’s best to consult with a professional. They can provide a precise diagnosis and replace the sensor if necessary.
How To Know Which TPMS Sensor Is Bad
Step 1: Check for Warning Lights and Error Messages
The first step in identifying a faulty TPMS sensor is to check for warning lights on your dashboard. Modern vehicles are equipped with a TPMS warning light that alerts you when there’s an issue. This light typically looks like an exclamation mark inside a horseshoe. If this light comes on, it means that at least one of your tires is not at the correct pressure. Do not ignore it, as driving with improper tire pressure can be dangerous.
Additionally, some vehicles will provide specific error messages related to the TPMS system. These messages might appear on a display screen and could give you more detailed information. For example, the message may indicate which tire is affected. If this feature is available in your vehicle, it can be extremely helpful. Take note of any specific warnings or error codes.
Remember, the TPMS light itself won’t tell you which sensor is bad. It only alerts you to a potential problem. Checking your vehicle’s user manual can give you more insight into the specific warnings your TPMS system may provide. Use this information to further investigate any issues. This step is crucial in getting to the bottom of the problem.
For those without error message features, recording the time and conditions when the warning light appears can be useful. Does it light up immediately when you start the car, or does it come on after you’ve been driving awhile? This information can help pinpoint the problem. Keeping a log can make troubleshooting more effective and less frustrating.
Step 2: Conduct a Visual Inspection of Tires
The second step in identifying a bad TPMS sensor is to conduct a thorough visual inspection of your tires. Start by looking for any obvious signs of damage or wear. Check each tire’s sidewall for cuts, cracks, or bulges. These issues can cause significant air loss, leading to a TPMS warning. Pay close attention to the tire tread, too.
If you notice uneven tire wear, it could indicate an issue with tire pressure. Uneven wear patterns are often a sign that a tire is either overinflated or underinflated. This type of wear can also point to a faulty TPMS sensor. Ensuring your tires are correctly inflated will help you spot any misbehaving sensors. Take your time during this visual inspection to catch any potential problems.
It’s also a good idea to check the tire valves and valve caps. Ensure that they are tight and in good condition. Sometimes, a loose or damaged valve can cause air leaks, triggering the TPMS warning light. If you find any defects, replace the valve or cap immediately. Simple fixes like this can solve the problem without the need for a professional.
After inspecting the tires and valves, look for any embedded objects like nails or screws. Even small punctures can lead to a slow air leak. If you find any foreign objects, it’s a good idea to remove them and patch the tire if necessary. This careful examination can help you identify which tire might be causing the TPMS issue.
Step 3: Manually Check Tire Pressure
Manual tire pressure checks are essential when diagnosing a TPMS issue. Begin with a reliable tire pressure gauge. Insert the gauge into the valve stem and take a reading. Compare this reading to the recommended pressure found in your vehicle’s manual. This straightforward step can help you catch inconsistencies.
It’s important to check all four tires, even if only one appears low. Sometimes, a small pressure difference can indicate a malfunctioning sensor. Mark down the pressure readings for each tire. You might find that one tire’s pressure is significantly different from the others. This could be a clue to the faulty sensor.
Checking tire pressure should be done when the tires are cold. Cold tires provide the most accurate pressure readings. If you’ve recently driven, wait a few hours before taking measurements. This ensures you’re getting true values rather than readings influenced by heat. Accuracy is crucial in identifying sensor issues.
If you find any discrepancies, it’s time to add or release air from the tires. Use an air compressor to inflate or deflate as needed. Recheck the tire pressure after making adjustments. Ensure all tires are set to the recommended pressure level. This process can help reset the TPMS light if the issue was due to uneven pressure.
Occasionally, low tire pressure can be due to a slow leak rather than a sensor problem. After inflating all the tires, monitor their pressure over several days. If one tire keeps losing pressure, you might have a slow leak. Identifying this can further pinpoint the source of your TPMS warning.
Finally, some vehicles require you to reset the TPMS system manually after adjusting tire pressure. Refer to your owner’s manual for specific reset instructions. Resetting can help the system recalibrate and recognize the correct pressures. This step might clear the warning light if no actual sensor is damaged.
Step 4: Compare Tire Pressure Readings
Once you have manually checked the tire pressures, it’s time to compare the readings. Use a notepad to jot down each tire’s pressure. This comparison will help identify any discrepancies. If one tire significantly deviates from the others, it might indicate a faulty sensor. Consistent differences across multiple readings can confirm the issue.
To make this easier, create a simple table. List the tire position and corresponding pressure reading:
| Tire Position | Pressure Reading (psi) |
|---|---|
| Front Left | 32 |
| Front Right | 32 |
| Rear Left | 29 |
| Rear Right | 32 |
In this example, the rear left tire shows a lower pressure reading. This difference points to a potential issue with the rear left tire’s TPMS sensor. Cross-referencing these results can help isolate the problematic sensor. This visual comparison is effective and easy to understand.
Make sure to perform this comparison under similar conditions for each tire. Avoid checking pressures after long drives as heat can affect the readings. Instead, check the pressures after the car has been stationary for a few hours. Keeping conditions consistent ensures accurate results.
If the readings are all within an acceptable range, but the TPMS light persists, there might be an issue unrelated to tire pressure. In such cases, further diagnostic steps or professional assistance might be necessary. Comparing tire pressure readings is a crucial step in narrowing down TPMS issues.
Step 5: Rotate Tires to Isolate the Faulty Sensor
If the previous steps have not identified the faulty TPMS sensor, rotating the tires can help. Begin by moving the tire you suspect has the bad sensor to a different position on the vehicle. This can be from front to back or side to side. After rotating, take the car for a short drive. Observe if the TPMS warning light changes position.
For example, if you move the tire with the suspected faulty sensor from the front left to the rear left, watch for the warning light. If the warning light now indicates an issue with the rear left, you’ve found the culprit. This method effectively isolates the bad sensor. It’s a simple and practical approach.
Rotating tires can be done at home if you have the necessary tools. You will need a jack, lug wrench, and a flat, level surface to work on. Always follow safety procedures when lifting your vehicle. Ensure the car is stable on the jack before removing any tires. Safety first!
If you have rotated the tires and the TPMS warning light remains in the same position, the problem might lie elsewhere. It could be a wiring issue or a system malfunction unrelated to the sensors. In this case, further diagnosis by a professional may be needed. Isolating the faulty sensor through rotation is a crucial troubleshooting step.
This process of rotating tires can sometimes fix minor alignment issues, too. It’s beneficial for overall vehicle maintenance. Regular tire rotation promotes even tire wear and prolongs tire life. So, it’s worth the effort beyond just identifying TPMS problems.
Signs That a TPMS Sensor Needs Replacement
There are several signs that indicate a TPMS sensor needs replacement. One of the most obvious is a persistent TPMS warning light on your dashboard. If this light stays on even after adjusting tire pressures, the sensor may be faulty. Persistent warnings can be frustrating, so addressing them promptly is important. Ignoring these signals could lead to bigger issues.
You might also experience frequent false alerts. Sometimes, a faulty sensor will trigger a warning even when tire pressure is adequate. These false alarms can become bothersome and misleading. Consistently dealing with erroneous warnings often means the sensor is malfunctioning. Replacing it will eliminate these unnecessary alerts.
A low battery indicator specific to the TPMS system can be another clue. TPMS sensors have batteries that wear out over time, typically lasting about 5-10 years. When these batteries are dying, sensors may not function correctly, leading to erratic readings. Checking and replacing sensors with low batteries can restore accurate monitoring.
Another sign is fluctuating pressure readings for no apparent reason but only in one tire location consistently. If you notice one tire showing different pressures each time you check it, despite not adding or releasing air, the sensor might be faulty. These inconsistent readings make it difficult to maintain proper tire pressure levels.
If you’ve recently had tires serviced or replaced and an issue arises shortly after, double-checking the TPMS sensors is wise. Sometimes during service, sensors can be damaged or improperly reset. Addressing such issues early can prevent longer-term problems and ensure your vehicle’s safety systems are fully operational.
Tools and Techniques for DIY TPMS Troubleshooting
When troubleshooting TPMS sensors without a scanner, having the right tools and techniques makes the job easier. A basic tire pressure gauge is essential for manual checks. This tool helps you accurately measure air pressure in each tire. Maintaining proper pressure levels can prevent false alarms. Add or release air as needed to match the recommended levels.
A tire inflator is another useful device. It allows you to adjust the pressure conveniently at home. Some inflators come with built-in gauges for quick readings. A high-quality inflator ensures you can properly inflate all your tires. Keeping your tires at the correct pressure can help reset any TPMS warnings triggered by uneven pressures.
You might also want to consider using soapy water for a leak test. This simple technique involves spraying soapy water around the tire valve stems and the tire surface. Bubbles forming will indicate a leak. This helps you identify punctures and slow leaks that can trigger TPMS warnings. It’s a quick and effective method for DIY troubleshooting.
Using a lug wrench and jack allows you to rotate tires as needed. Rotating tires manually can help isolate a faulty sensor. Moving a suspected faulty tire to a new position can verify the problem. This method requires some effort but can pinpoint the issue without special tools. Safety is key, so ensure your vehicle is stable while jacked up.
In some cases, a TPMS reset tool might be necessary. This tool can recalibrate the sensors after you’ve made adjustments. Though more advanced, some DIY enthusiasts find it useful. Follow your vehicle’s manual for instructions on using a reset tool. Proper use of these tools enhances your troubleshooting effectiveness.
Understanding TPMS Error Codes Without a Scanner
Deciphering TPMS error codes without a scanner can be challenging but not impossible. The key is to understand the signals your vehicle provides. If the TPMS light flashes first and then stays on, this usually means there’s a fault with the system. A steady light means one or more tires are underinflated. Knowing these indicators helps you take the right steps.
Sometimes, specific error codes may be displayed on your dashboard. Not all vehicles have this feature, but for those that do, it’s a valuable resource. Refer to your owner’s manual to decode these messages. Each code corresponds to a particular issue, such as low battery or sensor failure. Interpreting these codes guides your troubleshooting and repair efforts.
If your vehicle lacks detailed error messaging, consistency is your ally. Regularly checking tire pressures and maintaining them at recommended levels can prevent many TPMS issues. Document any patterns in TPMS warnings you notice. Patterns can hint at specific problems. For example, persistent issues after rain might point to water damage.
Some error codes can be reset manually through the vehicle’s onboard system. Consult your owner’s manual for the specific procedure for your car. Resetting the system after making corrections can clear false warnings. This step is essential for ensuring the accuracy of future alerts. Accurate error codes help you address real issues promptly.
Here’s a quick guide to common TPMS error signals:
- Flashing light followed by a steady light: System fault
- Steady light: One or more tires underinflated
- Error message with code: Check specific code in the manual
Understanding these basics allows you to tackle TPMS problems head-on. While a scanner provides more precise data, being aware of your vehicle’s manual reset options and signals can greatly aid in troubleshooting. This knowledge equips you to manage TPMS issues effectively without always relying on advanced tools.
Professional Solutions for TPMS Sensor Issues
When DIY methods don’t solve TPMS sensor issues, professional solutions become necessary. Auto repair shops are well-equipped to handle TPMS problems. Technicians use advanced diagnostic tools to scan and pinpoint the exact problem. These tools provide accurate data that DIY methods might miss. Professional diagnostics ensure a precise and efficient repair process.
Replacing a faulty TPMS sensor is a common professional solution. A technician will safely lift your vehicle, remove the tire, and replace the defective sensor. This process requires specialized tools and skills. Ensuring the sensor is properly installed is essential for accurate pressure monitoring. Professionals also program the new sensor to sync it with your vehicle’s system.
Sometimes the issue lies in the TPMS control unit rather than the sensors. The control unit coordinates data from all sensors. A malfunctioning control unit can mislead the system, triggering false warnings. Technicians can test the control unit for faults. Replacing a defective unit can solve persistent TPMS issues.
Regular maintenance visits to a professional can prevent TPMS problems. These visits often include tire rotation, balancing, and checking sensor health. Keeping the system and tires in good condition can prevent unexpected issues. Preventative maintenance saves time and money in the long run.
For commercial vehicles or those heavily relied upon, investing in a full TPMS diagnostics can be worthwhile. This comprehensive service involves a thorough check of the entire system. Technicians check sensors, control units, and related wiring. This approach ensures that all potential issues are addressed, enhancing vehicle safety and performance.
Frequently Asked Questions
Here are some common questions and answers related to TPMS sensors. These insights will help you better understand how to maintain and troubleshoot your tire pressure monitoring system.
TPMS sensors can fail for several reasons. One common cause is a drained battery, which typically lasts five to ten years. Physical damage to the sensor from impacts or improper handling can also cause failures. Additionally, corrosion from moisture entering the sensor can compromise its function.
Exposure to harsh road conditions, such as salt and debris, can further contribute to sensor failure. Regular inspection and maintenance can help identify these issues early. Timely replacement of damaged or worn sensors ensures your TPMS system operates effectively.
Resetting the TPMS system usually involves a specific procedure outlined in your vehicle’s manual. In many cases, you start by inflating all tires to the recommended pressure. Then, you follow the manual’s steps, which may include driving a certain distance to recalibrate the sensors.
Some vehicles have a reset button located under the dashboard or in the glove compartment. Pressing this button as instructed in the manual can help reset the system. It’s important to follow the exact steps to ensure the new sensor is properly recognized and functioning.
Aftermarket TPMS sensors can be just as reliable as original equipment manufacturer (OEM) sensors, if chosen carefully. Reputable brands often meet or exceed OEM standards and offer high-quality performance. However, it’s essential to ensure compatibility with your vehicle’s system.
Using substandard aftermarket sensors can lead to frequent errors and unreliable readings. Researching brands and consulting with professionals can guide you in selecting reliable aftermarket options. Proper installation and programming also play crucial roles in ensuring sensor reliability.
While it’s technically possible to drive with a broken TPMS sensor, it’s not recommended. A malfunctioning sensor means you won’t receive accurate tire pressure readings. Driving with incorrectly inflated tires can lead to reduced fuel efficiency and increased wear on your tires.
More importantly, underinflated or overinflated tires can be a safety hazard. They can cause handling issues, increase stopping distances, and even lead to tire blowouts. Addressing TPMS sensor issues promptly is essential for maintaining vehicle safety and performance.
The cost of replacing a TPMS sensor can vary. On average, a single sensor can cost between $50 and $100. Labor costs for installation can add another $50 to $150, depending on the shop and vehicle type. It’s a good idea to get quotes from multiple service centers to ensure a fair price.
Some shops offer package deals for replacing all sensors at once, which can be more economical. Regular maintenance and prompt replacement of faulty sensors can prevent other related issues. Thus, investing in quality TPMS sensors makes for safer and cost-effective driving in the long run.
HOW TO KNOW WHICH TIRE PRESSURE SENSOR IS BAD ON A CAR, Easy
Conclusion
In conclusion, identifying a faulty TPMS sensor without a scanner is entirely possible with patience and the right approach. By following the steps outlined, you can troubleshoot effectively and maintain your vehicle’s safety. Regular checks and timely interventions are crucial.
Professional assistance remains invaluable for complex issues, ensuring your TPMS system functions optimally. Investing in quality sensors and adhering to proper maintenance routines will enhance your driving experience and safety. Keep vigilant, and your TPMS system will reliably support you.