When was the last time you truly sanitized your RV fresh water tank and lines? Many RV owners underestimate the importance of keeping their water systems clean, leading to potential health risks. Ensuring a sanitized water tank can prevent bacteria buildup, providing peace of mind on every adventure.
Sanitizing your RV’s fresh water tank and lines involves more than just a simple rinse. Historically, RV owners have used household bleach due to its effectiveness in eliminating harmful pathogens. A compelling statistic shows that regular sanitation can reduce the risk of waterborne illnesses by up to 85%, making it a crucial part of RV maintenance.
- Prepare your supplies, including bleach, measuring cups, and a clean hose.
- Drain and flush the tank with clean water.
- Mix a sanitizing solution using 1/4 cup of bleach per 15 gallons of water.
- Fill the tank with the solution and run it through all lines.
- Let the solution sit for at least 12 hours.
- Drain the sanitizing solution completely.
- Rinse the system thoroughly with fresh water until no bleach smell remains.
- Test water quality to ensure safety before use.
How To Sanitize RV Fresh Water Tank And Lines
Sanitizing your RV fresh water tank and lines is essential for maintaining clean water. To start, gather necessary supplies like bleach, measuring cups, and a hose. Next, drain any remaining water from the tank completely. Once the tank is empty, flush it with clean water to remove any sediment buildup. Now, you’re ready to mix your sanitizing solution.
Create a sanitizing solution by mixing 1/4 cup of bleach for every 15 gallons of water your tank holds. Fill the tank halfway with fresh water, then add the bleach mixture. Next, fill the tank completely to ensure the bleach is well distributed. Turn on all faucets and let the water run until you smell bleach from each one. This will ensure the sanitizing solution reaches all parts of the system.
Allow the bleach solution to sit in the tank and lines for at least 12 hours. This waiting period is crucial as it effectively kills bacteria, mold, and algae. While waiting, make sure all faucets are closed to keep the solution in the system. After the waiting period, drain the tank again. Be sure to dispose of the used sanitizing solution according to local regulations.
Once drained, refill the tank with fresh water and flush the entire system until you no longer smell bleach. Run water through all your faucets to ensure all lines are clean. Repeat this process if necessary to remove any remaining bleach smell. Maintaining this routine keeps your RV water system clean, providing safe drinking water for your travels. Regular sanitization minimizes health risks and ensures continuous safe use.
How to Sanitize Your RV Fresh Water Tank \u0026 Plumbing System!
Step 1: Prepare Your Supplies
Before you begin, gather all the supplies needed to sanitize your RV fresh water tank and lines. Here is a quick list to keep you organized:
- Household bleach
- Measuring cups
- Clean water hose
- Protective gloves
- Funnel (optional)
Having these items ready will ensure the process goes smoothly.
Household bleach is your primary sanitizing agent. It’s effective against bacteria, mold, and algae that may be in your tank. Use protective gloves when handling bleach to avoid irritation. Additionally, make sure your water hose is clean to prevent contamination. If you do not have a funnel, carefully pour the bleach to avoid spills.
The amount of bleach you’ll need depends on the size of your water tank. Generally, use 1/4 cup of bleach per 15 gallons of water. Measure the bleach accurately to ensure the correct concentration. Improper measurements can be ineffective or too strong for safe use. Keeping a measuring cup dedicated to this task can help with accuracy.
Double-check that your supplies are clean and in good condition before starting. This precaution helps maintain water quality. Organize everything within reach to streamline the process. Being prepared makes sanitizing your RV fresh water tank and lines easier and more efficient. This step sets a strong foundation for a successful sanitation job.
Step 2: Drain and Flush the Tank
Draining the tank is the first step in properly sanitizing your RV’s fresh water system. Start by turning off the water supply and opening all faucets. This helps release any pressure in the system. Next, locate your tank’s drain valve and open it to let the water flow out. Be sure to place a bucket or direct the hose to an appropriate drainage area.
Once the tank is empty, it’s time to flush it out. Use your clean water hose to add fresh water back into the tank. Let this water run through the system for a few minutes. This step helps remove any lingering debris or contaminants. Check to ensure that the water draining out looks clear.
After the initial flush, repeat the process one more time to ensure thorough cleaning. It’s essential to remove as much sediment and buildup as possible. Flushing the tank twice is a good practice. This prepares the tank for the sanitizing solution. A clean tank ensures effective sanitization.
Use the following checklist to confirm you’ve completed this step:
- Water supply turned off
- Faucets opened to release pressure
- Tank drained completely
- Fresh water flushed through the system twice
Completing these tasks ensures your tank is ready for sanitizing. Each part of the process is crucial for maintaining a healthy water system in your RV. Having a well-flushed tank means the next steps will be more effective. This foundation will help keep your water clean and safe throughout your travels.
Step 3: Mix the Sanitizing Solution
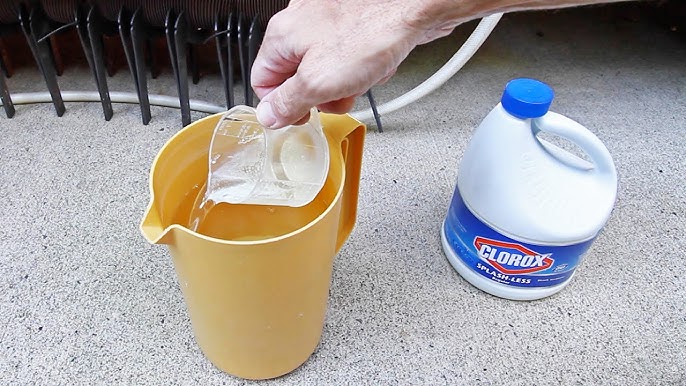
Now that your tank is drained and flushed, it’s time to mix the sanitizing solution. The key ingredient here is household bleach, which kills bacteria and algae. Make sure to wear protective gloves to avoid skin irritation. To determine the amount of bleach needed, use the following formula: 1/4 cup of bleach for every 15 gallons of water your tank holds. This ensures a safe but effective concentration.
For accurate measurements, use a measuring cup dedicated to this task. Pour the bleach into a bucket or large container, and add a bit of water to dilute it initially. This makes it easier to mix and prevents the bleach from splashing back at you. Carefully transfer the diluted bleach into your fresh water tank. A funnel can help with this task, reducing spills and waste.
It might be helpful to check the recommended bleach concentration for your specific RV model. Some manufacturers provide guidelines that might differ slightly. Always follow their instructions for best results. Ensuring you have the right ratio can make the process safer and more effective. Double-check your measurements to avoid overuse of bleach.
After adding the bleach, fill the tank with fresh water to its capacity. This will mix the bleach evenly throughout the tank. It’s vital to fill the tank to ensure that the sanitizing solution reaches every corner. Once filled, close all valves and caps on your tank securely. This keeps the solution inside and prevents contamination.
Using the following checklist can help keep you on track:
- Wear protective gloves
- Measure 1/4 cup bleach per 15 gallons of water
- Use a dedicated measuring cup
- Dilute bleach in a bucket first
- Transfer bleach to the tank using a funnel
- Fill the tank to capacity with fresh water
Mixing the solution correctly is key to a successful sanitization process. Completing this step ensures that your RV’s fresh water tank and lines will be effectively sanitized, reducing the risk of contamination. Following each of these steps carefully will help you maintain a safe and clean water system.
Step 4: Fill the Tank with the Sanitizing Solution
Once you have mixed the sanitizing solution, it’s time to fill the tank. Use your clean water hose to fill the tank with the bleach mixture. Ensure the hose is securely attached to avoid spills. Slowly add the sanitized water to the tank. This careful approach keeps the process clean and efficient.
Filling the tank requires some patience. Make sure the water is filling the tank evenly. Check for any leaks or drips around the hoses and valves. If you find any, tighten the connections immediately. A slow and steady fill is the key to even distribution.
As the tank fills, check the water level periodically. Stop occasionally to ensure it doesn’t overflow. Use the tank’s gauge, if available, to monitor the level accurately. A helpful tip is to fill the tank about 90% to allow for expansion. This avoids pressure build-up and potential spills.
After filling, turn on your water pump and open each faucet one by one. Doing so will draw the sanitizing solution through the entire water system. Let the solution run until you smell bleach at each outlet. This indicates that the sanitizing solution has reached the entire plumbing system. Ensure all faucets and outlets have run the sanitizing solution through them.
Creating a checklist can ensure you haven’t missed any steps:
- Secure clean water hose
- Fill the tank slowly and evenly
- Check for leaks and tighten connections
- Fill to 90% capacity
- Turn on the water pump
- Open each faucet until the bleach smell is detected
Following this method ensures that your RV fresh water tank and lines are thoroughly sanitized. Properly filling the tank allows the solution to work effectively. This step is vital in maintaining safe water quality during your travels.
Step 5: Run the Solution Through the Lines
Running the sanitizing solution through the lines is a crucial step. Begin by turning on the water pump. Slowly open each faucet, one at a time. This step ensures the solution travels through all pipes. Watch for the bleach smell indicating the solution is in the lines.
Be thorough as you open and run each faucet. Include hot and cold water lines. Don’t forget outdoor showers and any other water outlets. Each line must carry the solution to eliminate bacteria. Allow the water to flow until the bleach smell is strong and consistent.
Using the following checklist can keep you on track:
- Turn on the water pump
- Open each faucet one at a time
- Ensure both hot and cold water lines run the solution
- Check all water outlets, including outdoor showers
- Wait for a strong bleach smell
Following this checklist ensures all lines are sanitized. Thorough sanitation prevents bacteria buildup. This step is essential for safe, clean water. Every outlet must be treated with care.
Once the solution has run through all the lines, shut off the faucets. Let the system sit with the bleach solution for several hours. Usually, 12 hours is recommended for the best results. This dwell time is critical to kill all harmful organisms. Afterward, you can proceed with the next steps to ensure complete sanitation.
Step 6: Let the Solution Sit
Allowing the sanitizing solution to sit in your tank and lines is vital for effective cleaning. This step ensures that all bacteria, molds, and algae are killed. Typically, you should let the solution sit for at least 12 hours. During this time, refrain from using any of the water outlets. This waiting period may seem long, but it’s necessary.
While you’re letting the solution sit, double-check that all faucets and valves are closed. Ensuring a sealed system prevents contamination from external sources. This step also stops any leaks of bleach mixture that could cause damage. Take a moment to inspect everything one last time. Peace of mind comes from knowing every part is secure.
You may want to plan other activities while waiting for the soak period to pass. Perhaps take a trip or work on another RV project. Making good use of this time can make it go by faster. To keep track of when you need to return, set a timer or an alarm.
If you prefer more structure during this wait, consider using a simple table like this:
| Activity | Time Spent (hours) |
|---|---|
| Inspecting RV systems | 1 |
| Running errands | 2 |
| Catching up on reading | 2 |
| Exploring surroundings | 3-4 |
This will help you manage your time effectively and ensure you’re ready to proceed once the soaking period is complete. Utilizing this downtime wisely keeps you productive while your RV benefits from thorough sanitation. Every hour spent waiting contributes to cleaner and safer water in your RV.
Step 7: Drain the Sanitizing Solution
After the sanitizing solution has sat for the recommended time, it’s essential to drain it out properly. Begin by opening the drain valve on your fresh water tank. Make sure to catch the solution in a bucket or let it flow into an appropriate drainage area. The drained solution will contain bleach, so handle with care. Wear protective gloves during this step.
Next, open all the faucets in your RV one at a time. This will help to flush the solution out of the lines. Start with the faucet furthest from the tank to ensure all areas are addressed. Run each faucet until the bleach smell fades. This can take a few minutes per faucet.
As an additional precaution, use a list to track this step:
- Open the tank drain valve
- Collect the drained solution responsibly
- Open all faucets, starting with the furthest one
- Run water until the bleach smell disappears
- Wear gloves to handle the solution
Using a checklist can make this process organized and efficient. Once all the solution is drained, close the faucets and the drain valve. This ensures your system is ready for the next step. Double-check every point to ensure completeness.
Properly draining the sanitizing solution is a key step in cleaning your RV’s fresh water system. Failing to do this thoroughly can leave behind harsh chemicals and impact water safety. Proper drainage prevents contamination and prepares the system for rinsing. This sets the stage for a fresh and clean water supply.
Step 8: Rinse the System Thoroughly
After draining the sanitizing solution, the next step is to rinse the system thoroughly. Begin by refilling the fresh water tank with clean water. Use a clean hose to avoid reintroducing any contaminants. Once the tank is full, turn on the water pump. This helps flush out any remaining bleach from the system.
Next, open each faucet one by one to let the clean water run through the lines. Start with the faucet closest to the tank and work your way outward. Allow the water to flow until you no longer smell bleach. This ensures that all traces of the sanitizing solution have been removed. Be patient, as this may take a few minutes for each faucet.
To ensure thorough rinsing, use a checklist:
- Refill fresh water tank with clean water
- Turn on the water pump
- Open each faucet in sequence
- Run water until bleach smell disappears
This checklist helps you stay organized and ensures no step is missed. Rinsing properly maintains water quality. Ensure every water outlet is covered. This avoids any remaining residues.
For extra assurance, consider repeating the rinse process. Fill the tank again and let the water run through all the lines. This double-flushing guarantees that your system is free of any lingering bleach. Clean, fresh water is crucial for both health and taste. Completing this step ensures your RV water system is ready for use.
Proper rinsing protects against chemical exposure. This final step guarantees your RV’s fresh water system is clean and safe. Ensuring every part of the system is thoroughly rinsed maintains the quality of your water supply. A clean system provides peace of mind during your travels.
Step 9: Test the Water Quality
After rinsing the system thoroughly, it’s essential to test the water quality. This step ensures that the sanitizing process was successful. Testing kits are available at most hardware stores. They check for contaminants like bacteria and chlorine. Using a kit is straightforward and quick.
Begin by collecting a sample of water from one of your faucets. Follow the instructions on your testing kit for accurate results. These kits often come with easy-to-read strips that change color. Compare the strip to the provided chart. This will indicate whether your water is safe to drink.
For more detailed results, you might choose a lab test. Some kits allow you to send a water sample to a lab. These tests are more comprehensive. They check for a wider range of contaminants. A lab test provides peace of mind for ensuring water safety.
Utilize the following checklist to keep your test process organized:
- Purchase a water testing kit
- Collect a water sample
- Follow kit instructions for testing
- Compare results with the provided chart
- Consider sending a sample to a lab for a detailed test
This checklist ensures that you cover all aspects of testing. Maintaining water quality is crucial for health. Regular testing keeps you informed. It’s a small step with significant benefits.
Confirming your water quality guarantees that it’s safe for drinking and cooking. Regular testing also helps catch potential problems early. This ensures a healthy and enjoyable RV experience. Safe water is essential for peace of mind. Trust your tests and enjoy your travels.
The Importance of Regular Sanitization
Regular sanitization is crucial for maintaining clean water in your RV. Without proper care, harmful bacteria and mold can grow in the water system. This can lead to illnesses and an unpleasant taste. By routinely cleaning your RV’s fresh water tank and lines, you ensure safe drinking water. This simple habit can protect your health on the road.
Sanitization involves more than just rinsing the tank with water. It requires the use of a disinfectant, like bleach, to kill germs effectively. Regularly cleaning every few months keeps the system in top shape. Consider setting a reminder on your phone to keep track. Staying consistent helps maintain high water quality.
Ignoring regular cleaning can lead to serious issues. Mold buildup not only affects water taste but also poses health risks. Bacteria can cause stomach problems or worse. Here’s a simple list to show the potential risks of not sanitizing:
- Mold and mildew growth
- Bacteria leading to illness
- Unpleasant water taste and smell
Seeing these risks makes the importance of sanitization clear. It’s about more than just clean water; it’s about your health and safety. Regular maintenance prevents the buildup of contaminants. This proactive approach ensures you always have safe water available.
Consistent cleaning extends the lifespan of your RV’s water system. It prevents damage from debris and buildup. This can save you money on repairs in the long run. Regular sanitization makes your RV experiences worry-free. Clean, fresh water is a vital part of a happy journey.
Common Mistakes When Sanitizing RV Water Systems
Many RV owners make common mistakes when sanitizing their water systems. One frequent error is not using the right amount of bleach. It’s vital to measure accurately: too little bleach won’t kill all the germs, and too much can harm your health. Always follow the recommended ratio for your tank size. This ensures effective cleaning without risks.
Another mistake is not letting the solution sit for long enough. The sanitizing solution needs time to work. Rushing this step can leave harmful bacteria behind. Make sure to let the solution sit for the full recommended period, usually 12 hours. Being patient in this step is crucial for thorough cleaning.
Some people forget to rinse the system adequately after sanitizing. Residual bleach can make the water taste bad and cause health issues. It’s important to run clean water through all faucets until you no longer smell bleach. This step ensures the system is safe for use. Proper rinsing eliminates any leftover chemicals.
Using an unclean hose is a mistake that can reintroduce contaminants. Always use a clean, dedicated hose when filling and flushing your tank. This prevents dirt and bacteria from entering the system. Regularly inspect and clean your hose to maintain its condition. A clean hose ensures the sanitizing process is effective.
Lastly, forgetting to sanitize the entire system is a common oversight. Some may only clean the tank, neglecting the lines and faucets. Remember to include every part of the water system in your cleaning routine. Here’s a handy list to make sure you cover everything:
- Fresh water tank
- All water lines
- Faucets and showerheads
- Outdoor water outlets
By avoiding these common mistakes, you ensure that your RV water system remains clean and safe. Regular and thorough sanitization keeps your travel experience pleasant and worry-free.
When to Seek Professional RV Maintenance
Knowing when to seek professional RV maintenance is important. Some issues are too complex for DIY fixes. If you’re experiencing persistent water leaks, it’s wise to consult a professional. Leaks can lead to bigger problems like mold and structural damage. An expert will have the necessary tools and knowledge to locate and fix the issue.
Electrical problems in your RV should also be handled by professionals. Electrical systems are intricate and can be dangerous. If you notice flickering lights or issues with your power outlets, seek help. Professionals can diagnose and resolve these problems safely. Attempting to fix such issues yourself can result in injury or further damage.
Engine trouble is another area where professional help is crucial. If your RV’s engine is making strange noises, stalling, or showing warning lights, don’t ignore it. A qualified mechanic can accurately diagnose and fix engine problems. This ensures your RV remains reliable and safe during your travels. Regular engine maintenance also extends the life of your vehicle.
Problems with your RV’s plumbing system may need a professional touch. If you’re dealing with frequent clogs, low water pressure, or smelly pipes, it’s time to call an expert. They can thoroughly inspect and repair any issues. Proper plumbing is essential for a comfortable and healthy living environment.
To make it easier to decide when to seek professional help, here’s a list:
- Persistent water leaks
- Electrical issues
- Engine trouble
- Plumbing problems
This list can help guide your decision. Seeking professional RV maintenance at the right time can prevent small issues from becoming major problems. Professionals have the expertise and tools to handle complex repairs efficiently. This ensures your RV remains in top condition for a smooth and enjoyable journey.

Frequently Asked Questions
Sanitizing your RV’s fresh water tank and lines can seem daunting, but it’s essential for clean and safe drinking water. Here are some common questions and answers to help guide you through the process.
It’s recommended to sanitize your RV fresh water tank at least twice a year. Regular sanitization ensures that bacteria and mold do not build up in your tank and water lines, keeping your drinking water safe. If you use your RV frequently, consider sanitizing it more often.
Additionally, you should always sanitize the tank at the beginning of each camping season. This ensures that any contaminants that may have developed during storage are eliminated. Regular cleaning helps maintain water quality and extends the lifespan of your plumbing system.
Yes, you can use vinegar as a natural alternative to bleach for sanitizing your RV water tank. While bleach is highly effective, some people prefer using vinegar due to its less harsh chemical properties. Simply mix a solution of one-quarter vinegar to every gallon of water in your tank.
Run this solution through the system, let it sit for several hours, and then thoroughly rinse with clean water. Although vinegar is generally less effective against bacteria than bleach, it’s a safer option for those concerned about chemical residues. Always test the water quality after sanitizing, whichever method you choose.
Some common signs that your RV water tank needs sanitizing include a foul odor, a strange taste in the water, or discolored water. These signs indicate the presence of bacteria, mold, or algae. Sometimes, sediment build-up at the bottom of the tank can also be a clue.
If you notice any symptoms of water contamination, it is critical to sanitize your tank immediately. Drinking contaminated water can lead to various health problems. Always carry out proactive maintenance to avoid these issues and enjoy safe, clean water during your travels.
After sanitizing your RV fresh water tank, always ensure to thoroughly rinse out any remaining bleach or vinegar solution. Run clean water through the system until you no longer smell bleach or vinegar. This ensures that any residual chemicals are flushed out.
Once you’ve adequately rinsed the system, the water should be safe to drink. It’s still good practice to test the water quality to ensure all contaminants have been removed. Being cautious ensures the health and safety of everyone on board.
Running the sanitizing solution through all water lines and faucets ensures that every part of your RV water system is disinfected. Bacteria and mold can hide in any part of the plumbing, not just the tank. By circulating the solution, you ensure comprehensive cleaning.
This thorough approach helps maintain the overall quality of your water system. Neglecting any part of the system can lead to incomplete sanitization, leaving some contaminants behind. Ensuring every line and faucet is treated provides peace of mind and health safety.
Sanitizing your RV water systems // Summerizing your RV
Conclusion
Sanitizing your RV fresh water tank and lines is vital to ensure a safe and healthy water supply during your travels. By following a consistent sanitization routine, you can effectively eliminate harmful bacteria and mold. Regular maintenance not only keeps the water clean but also extends the lifespan of your RV’s plumbing system.
Approaching each step diligently and avoiding common mistakes will make the process smoother and more effective. Whether using bleach or vinegar, always ensure thorough rinsing and testing of water quality. Maintaining these practices guarantees a safe and enjoyable travel experience every time.